Well, another fail in that I forgot to take pictures in the making of these little fellows!
Sunday, November 11, 2012
Painting Gourds
Well, another fail in that I forgot to take pictures in the making of these little fellows!
Making Candles!
As a maker of soap and lotion, I knew I wanted to make candles when I saw pins on Pinterest. This was my first attempt.
I bought some soy flakes off ebay. Big mistake. The soy was good, Golden brands 464, but the transaction...not so good. Anyway...
First I hot glued the wicks (make sure you get the right size for the opening of your jar) into the bottom of my jars.
Then, I melted the wax in an old rice cooker. It worked great! BUT, you must watch it and make sure you remove it from the heat source as soon as it gets to about 180 degrees. Use a thermometer. Can't stress that enough!
Then, I make my mistake.
I used a water based colorant to color the wax, FIGURING that if it worked with soap and lotion (oil based) it should work with candles. Nope. Left little clumps of colorant that I had to strain with cheese cloth. No pictures of this little mistake as it took two hands to fix my mess. You'll see my boo boo, as in flakes in my candle, in a picture to come.
I found a great place for supplies and oil based colorant, Candles and Supplies
I bought some soy flakes off ebay. Big mistake. The soy was good, Golden brands 464, but the transaction...not so good. Anyway...
First I hot glued the wicks (make sure you get the right size for the opening of your jar) into the bottom of my jars.
Then, I make my mistake.
I found a great place for supplies and oil based colorant, Candles and Supplies
The Family Table
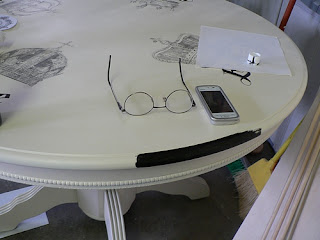
My husband, who is the "World Finest Spray Painter" (no exaggeration) was who I enlisted to paint the table. He has painted numerous items and the man NEVER has his paint to run. I bow to the master.
I knew I wanted to use different "Crowns" that were available from The Graphics Fairy.
We each chose different "Crowns" from her website. I then typed each name of our family and placed them under our chosen "Crowns". After, I printed them off on the laser printer and transferred them to the table using the Citrasolv Method.
IMPORTANT POINT!!!
I forgot to add that I sealed the table using 5 (yes 5) coats of Minwax Polycrylic. After 5 coats I was still concerned if the water based finish would be strong enough. So, on went two coats of Polyurethane! It has already turned yellow. (I had a caddy in the center and you can see the outline). I removed the caddy, and it seems to be fading, but I'm afraid we will eventually have a yellow top table!
Subscribe to:
Comments (Atom)


