Pages

Saturday, December 13, 2014

DIY Victorian Mantel


I have always loved the look of a Victorian Fireplace! Our fireplace was very pretty to me before, but I got it into my head when I saw a lone mirror for sale at GOODWILL for $19, it could be transformed into my dream fireplace. The cool thing is, this mirror was originally attached to a bedroom dresser! You never know what treasures or potential treasures you will find at Goodwill!

Anyway, first I had to get that big boy home, then I had to talk my husband into painting it. I knew I wanted my husband to do it because he is a genius with spray paint. I leave runs every time, but he is a spray paint artist. (I don't have a picture in its original mahogany state). But, being the all around good guy that he his, he agreed.

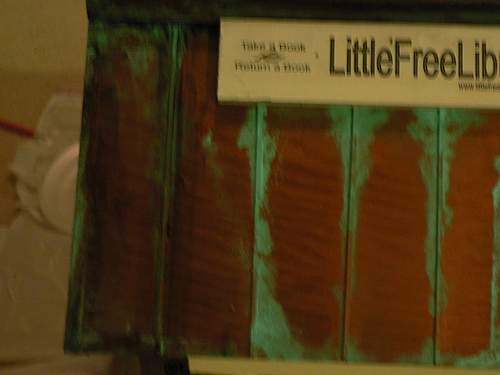
I taped around the three "mirrors", last go 'round adding newspaper so there wouldn't be a lot of scraping of paint off the mirror.

Sorry for the mess, but we decided to finally "attach" this to the wall when putting up Christmas decorations! This is after removing tape and newspaper.

Then, my husband drilled a hole in the center top of the frame to anchor the mirror to the wall.


Next, my husband and daughter lifted the mirror in place and measured where the anchor bolt would go. Hubby also used another bit to countersink the screw so we could spackle. (Getting ahead of myself!)

 Up, down, up, down. I'm glad they love me!


Anchor bolt.


I'll come back and repaint when I have time.

Ahh...Sitting back and enjoying my new mantel!

Sunday, August 24, 2014

Young Elizabeth Taylor


I haven't had much time to paint in recent months, but I watched a video that discussed the "Flemish Technique" when painting. The video said to paint the canvas all over in a burnt umber, but I went with red/orange. I like using the red/orange because I tend to paint from photos and if you're a novice, like me, you tend to have paintings that are washed out. This time I wanted some life in it! Funny I should say I wanted some life in it it, because after you put the base down using the Flemish Technique, you paint shadows and darks, creating a "dead layer". I mixed up Transparent Earth Oxide and black and created a couple of shades of green. You then use the darker green for the shadows, lighter for the midtones. It was amazing having the green shadows as flesh has blues/purple/green in it anyway. The rest was so much easier with the green against the orange as a guide. Mostly tweeking after that to get the results. I'll try this method again as I love the richer color. 

Basically, I've discovered that paint is just practicing and learning. I don't think one ever stops. I look forward to a time when I can devote more of myself to both.

Friday, April 18, 2014

Woman Portrait

Well, I think I'm getting better. Been doing a lot of practicing. The first time I attempted this lady, I used the Zorn Palette. I LOVE using a pre-mixed palette, BUT, Zorn didn't use any blue and I wanted some blue in my painting. So...I modified the palette and added blue. Unfortunately, I tried to "enhance" Zorn's palette even further and completely missed the mark. From now on, Zorn...but with blue.

Friday, March 7, 2014

Saturday, December 7, 2013

Little Free Library

The "Little Free Library" is a wonderful idea/program that was thought of to encourage people to read.  It also gives others the chance to help facilitate reading for those who do not have quick access to a Library, or, for whatever reason, choose not to go to a formal library.

Our church has a distribution center for Second Harvest Food Bank. Many of the people who utilize this service have children who could benefit immensely from the "Little Free Library".  Clients of Second Harvest will be encouraged to take advantage of the books offered within the "Little Free Library"; return them and then get another.  This program is catching on like wildfire and it makes me happy.  Education is the cornerstone for everything we do in this life. I am delighted that I can help in this small way.


 First I painted the roof metallic copper.

 The next thing I did was paint on patina Folk Art paint. 

Then I took my trusty water bottle and let the green "run" to give it a realistic feel.

 Then I added black and did the same with the water.

I also dabbed with a paper towel places where there was too much black or too much green.

 Next, I painted the sky blue, added the foreground and a tree.

 Then I painted books "growing" in my tree.

 Adding "titles" to the books.

 On the opposite side of the Library, I added a quote from John Wesley.


 And finally, I was SO close to being finished...

But...I had to add the little flourishes besides "Take a Book" and "Return a Book".
I can't wait to see this in our garden at Church!  Will post more pictures when it's in it's final spot!

Tuesday, August 13, 2013

Painting Portraits

I have always been drawn to portraits. The eyes, the expressions, the "feel" of someone.  I've been attempting to gain a grasp of just how to paint a portrait...most of my trying has been in acrylics.  While I have had some success, I went to a workshop this weekend and it was in oils.  Boy did that put a totally different spin on the process!  When life allows, I'll be trying to paint another oil portrait.  I also had probably the best teacher there ever was!  I love it when people who "can" share their knowledge!


Thursday, May 16, 2013

Beach Buddies


I am having a hard time figuring out my painting "Style".  I've done a few portraits and will post later.  I think I might like them best.  THIS I had major fun with!  But...no faces so it wasn't nearly as daunting.  AGH!

Saturday, April 13, 2013

Scarlett O'Hara Portrait


The other day I got it into my head to paint Scarlett O'hara.  I took pictures of some of the phases, but wanted to go ahead and post.  This is acrylic, done on masonite.