Pages

Saturday, June 23, 2012

Rustic Bench with Citrasolv transfer

I've been sitting around with my bench painted for about 2 months.  I decided TODAY was the day for it's makeover!
First, I decided what I wanted written on my bench.  I opened up my new design program, Serif Drawplus, typed out and sized my info, then "mirror imaged" my design.  I knew I wanted my typeface to look vintage/rustic.  Here's what I came up with for my house number.
Here's what I came up with for our city and state.
I used my handy dandy "lightbox" to light up and tape together where I had to print the address in two sections.
Next, I cut everything out, tried to center it without a ruler (not wise), and taped it down.
Now the fun begins!
I got my Citrasolv, Q-tip and a spoon.
When doing furniture, you want to use a small amount of Citrasolv.  Applying with a Q-tip is the easiest way to control the amount of Citrasolv.
Next, you burnish your image down with a spoon.  I'm guessing other things can work, too, but a spoon allows you to apply a lot of pressure and gives you control.

POTENTIAL PROBLEM:  When transferring images onto wood, the toner has a tendency to smear if the painted area is too smooth.  I used spray paint on this smooth bench.  SO, the toner did not adhere...but smeared.

POTENTIAL SOLUTION:  Take Sharpie and go over smeared, transferred image.
But first, get fancy Dollar Tree reading glasses if you're almost blind...like me.
 
ah...better


And finally, we ended up with this:

Wednesday, June 20, 2012

Simple Painting

You may have seen these places where you go and paint a picture in 2 hours.  There is one in the Nashville, TN area called "Paint Along".  It is FABULOUS!  You have the best time, and you actually do paint a picture in two hours.  I learn more about painting AFTER the class is over, because it is then that I actually have time to "dissect" what I did wrong!  Still, with the right company, you will have a blast and learn a few things, too.

I didn't have my camera, so I used the one on my phone.  (Sorry about the poor quality.)

First we painted our background.  On this painting, we used a light blue/teal color, then quickly added a darker blue and blended.  Then we went on top of the wet "blues" and dabbed white for clouds.  I was too heavy with the white, and my clouds, I feel, are overpowering.  (lesson learned!)
Next we added our base "branch" aka tree trunk.  We started with a basic brown, (see below) then "branched out" from there.

After we had our base, we added more branches, using upward strokes.  We then took our tan and black paint to add shading and dimension.

Our next step was to add flowers.  We did this by either using the end of our paint brush and dabbing "circles", or free handing.  After we had the flowers, we added white to the center, then black to the center of the white.  
I really wasn't pleased with my final project, but I will take what I learned and trudge on!  Everyone is artistic.  It's the confidence, or lack of that either propels us to achieve more, or stop in our tracks.  Keep on trying!  You just may surprise yourself!

Saturday, June 9, 2012

How to make Apothecary Jars


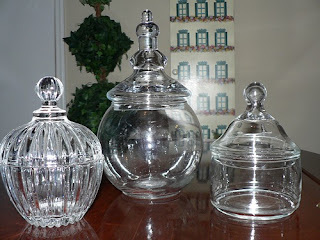
Since first seeing Apothecary Jars on either Pinterest or Stumbleupon, I have become obsessed!  I have been buying candy dishes and candle sticks left and right.  Today I finally decided to assemble the easiest ones...the ones without paint.  Here's what you start with:

Cute jars with lids.

 Add to that:
Candle sticks either from Dollar Tree, Yard Sales or Thrift Stores.


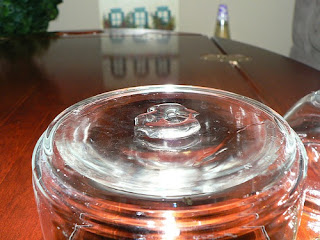
 You run a bead of the E-6000 on to BOTH surfaces.  Around the rim of the candle sticks, and in the center of the bottom of the candy dish.  

Let them "set" for 10 minutes.  O.K.  I can NEVER wait 10 minutes, so I'm hoping three is enough.


Turn the candy dish over, and attach the candle stick.  Try not to have strings of glue like I did!  You want to try to center as best you can.  Slide it around a bit when you flip it over to make sure the candy dish doesn't look lopsided.

Let them set overnight.
And the final project looks like...


Tuesday, June 5, 2012

How to Make a Money Tree

A few weeks ago, I volunteered to make a money tree as a goodbye gift for our Pastor and his wife.  I had made one years before, but couldn't remember exactly how I did it!  I scoured the net, and took a little info. from "this site" and a little from "that site" and came up with my own version. 


You are going to need:
     One twig -- approximately 1.5 feet tall that has a good shape
     A pot -- I got mine at Dollar Tree.  It had a little more personality than a standard pot.
     Mini Clothespins -- I bought a pack of 50 at Michaels.  (Later found them at Walmart.)
     Foam -- Also from Dollar Tree
     White Spray Paint

First I spray painted the twig white, then painted the clothespins.
While the Clothespins were drying, I went to the computer and typed the word "Blessings".  I used a program called Serif PagePlus X6.  It's not InDesign or one of the Adobe products, but it's a great graphics program for the financially challenged.  I put the type on a curve, then switched it to "Mirror Image" and printed it out.


 After I printed off the design, I took pastel chalk and rubbed it over the back of the image, then I traced it onto the pot.


For some reason my hands were not very steady today, and my painted "Blessings" didn't come out as well as I had hoped.  sigh...

Next, I assembled the tree:


I added some ribbon to the stem, (which my daughter didn't like) so use your own judgment.


I hot glued clothespins to the strongest branches.

 I attached the money by "clipping" the bills carefully to the tree with the clothespins.  The smaller limbs are very fragile, so maybe you don't want to add too many one dollar bills!
And that was it!  I did put some spanish moss around the base, but I think I'll remove that and add a base of coins!  All in all, a fun project that can now be recycled as a different kind of blessing tree. 

After the money is removed, people can use small cards and write things they are thankful for and "clothespin" their Blessings to the tree!